Git
The Git panel shows the repository of the active tab: its branch, its changes, its history and its pull request. From there you commit, push and pull without going through the console.
Termo uses the git you already have installed, with your same configuration.
What you need
| Tool | What for |
|---|---|
git |
Everything the panel does |
gh (GitHub CLI) |
Seeing and editing GitHub pull requests |
glab (GitLab CLI) |
Seeing and editing GitLab merge requests |
Without gh or glab everything else works the same: only the pull request is not shown. Termo uses the session you already have in each and keeps no token.
Preferences → Git → Tools shows which ones are installed and signed in.
Open the panel
Press Ctrl+Shift+S (⌘⇧S on macOS), or click the Git button on the panels bar. The button shows how many files have changes.
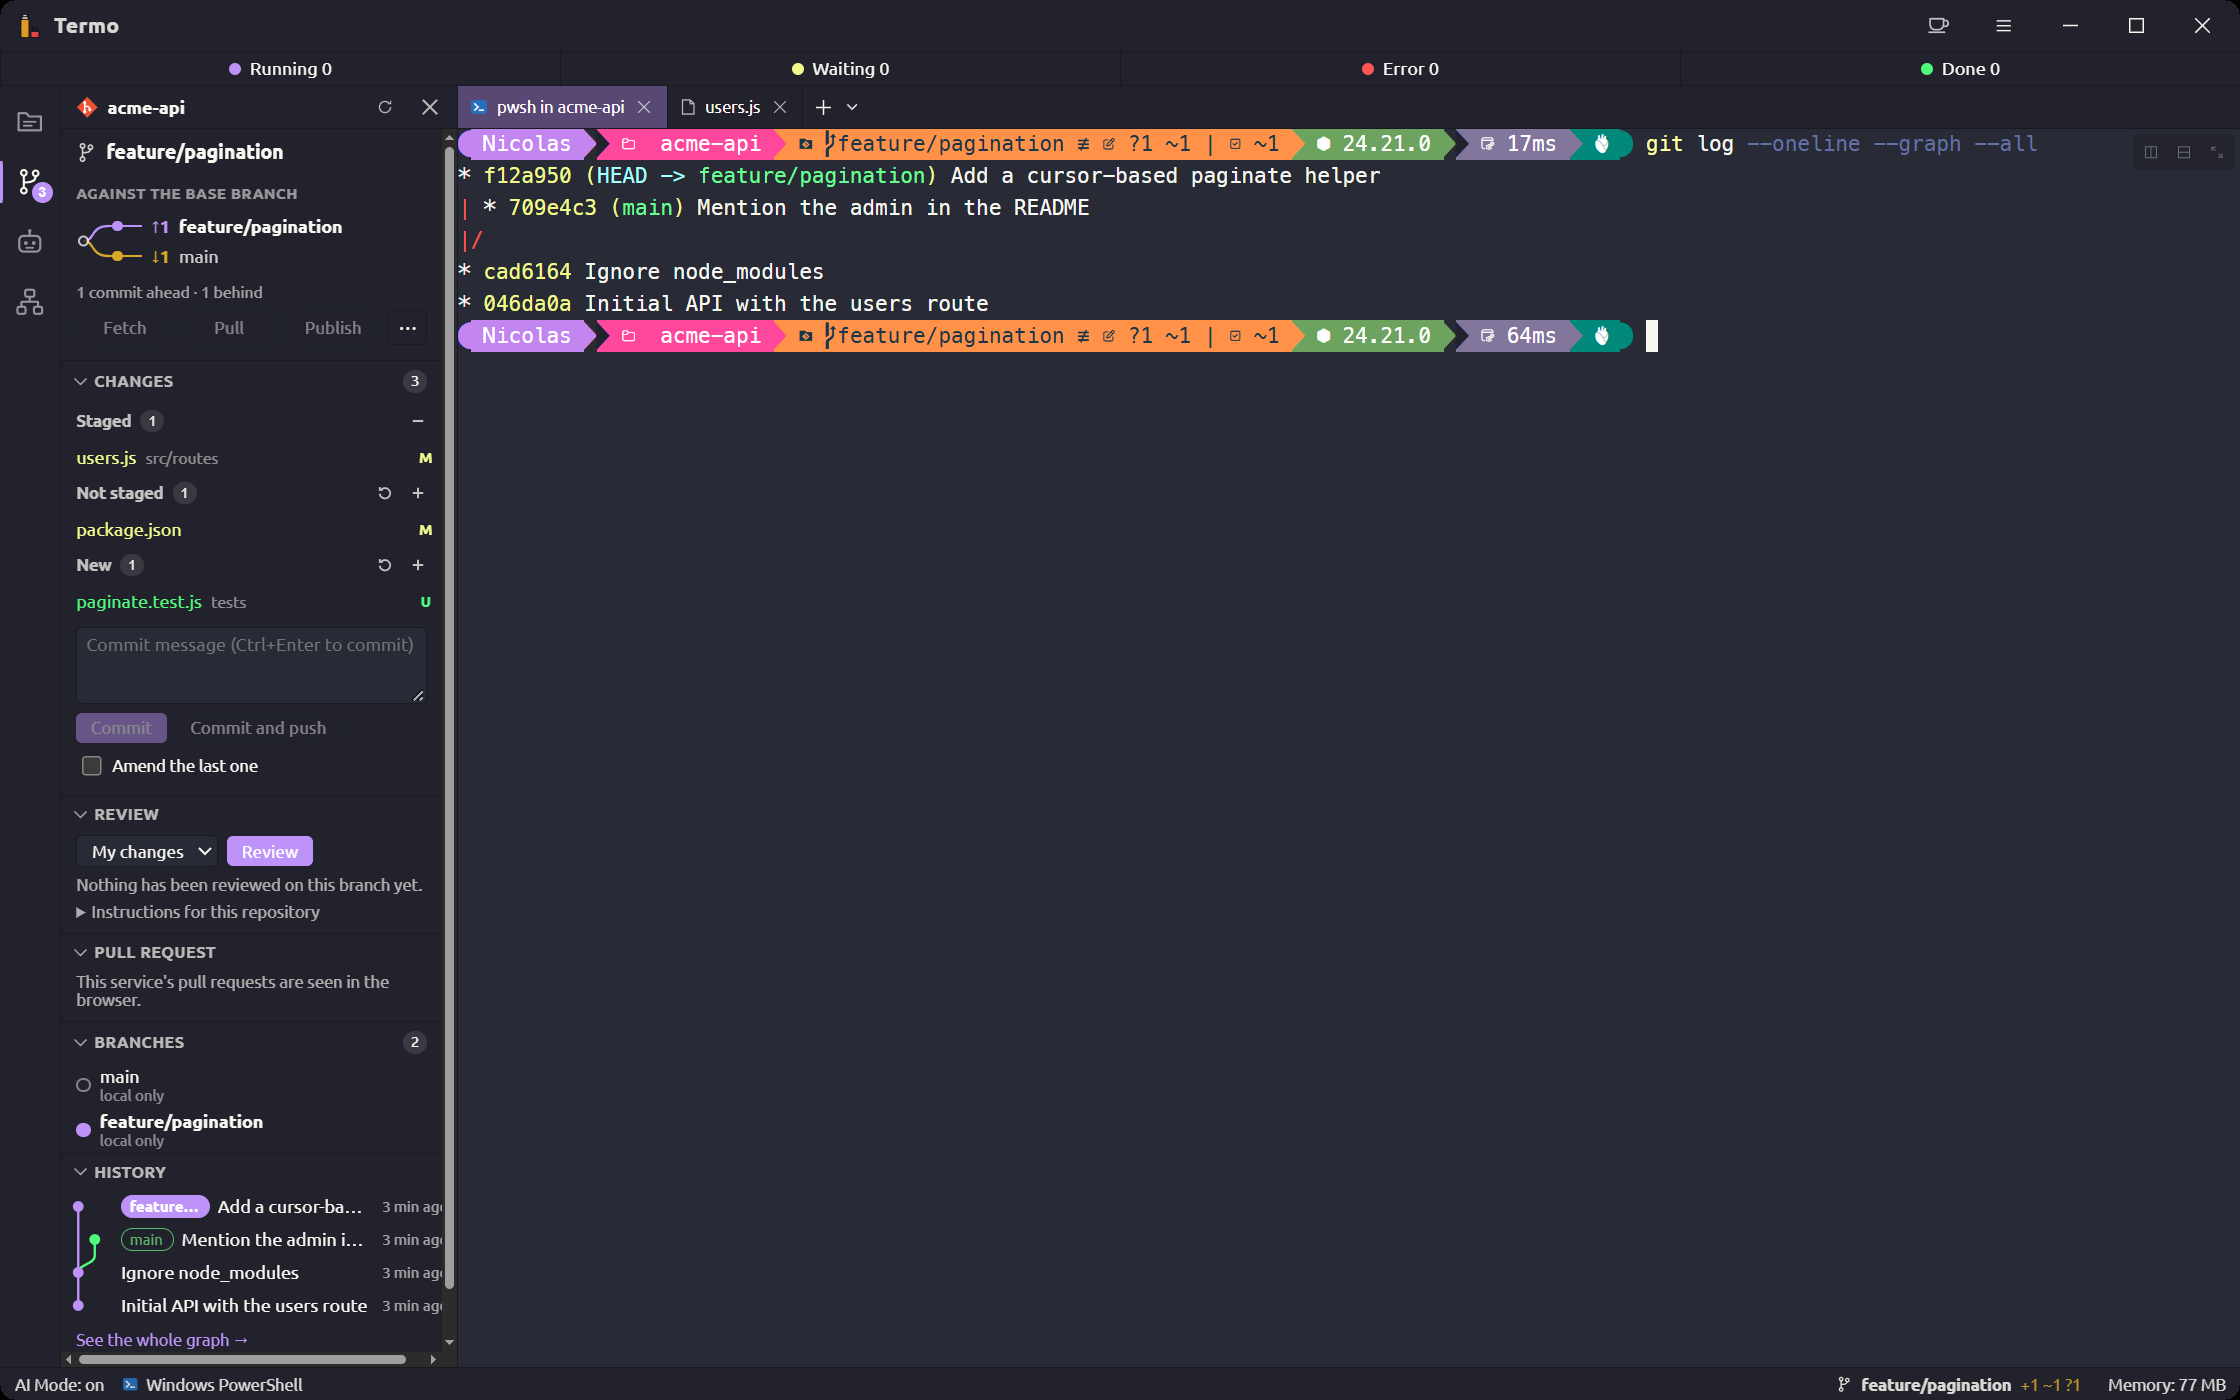
The panel follows the active tab: when you switch tabs, it shows that folder's repository. If the folder is not a repository, it says so.
It is divided into sections that collapse: Changes, Review, Pull request, Branches, History and Remotes.
The repository on the status bar
Even with the panel closed, the status bar shows the active tab's repository:
- the branch's name,
- the commits to push and to pull (
↑↓), - the files with changes (
+staged,~not staged,?new,!in conflict), - the pull request's number.
Click it to open the actions: commit, pull, push, fetch, sync, switch branch, create a branch, stash, review with an agent and open the pull request.
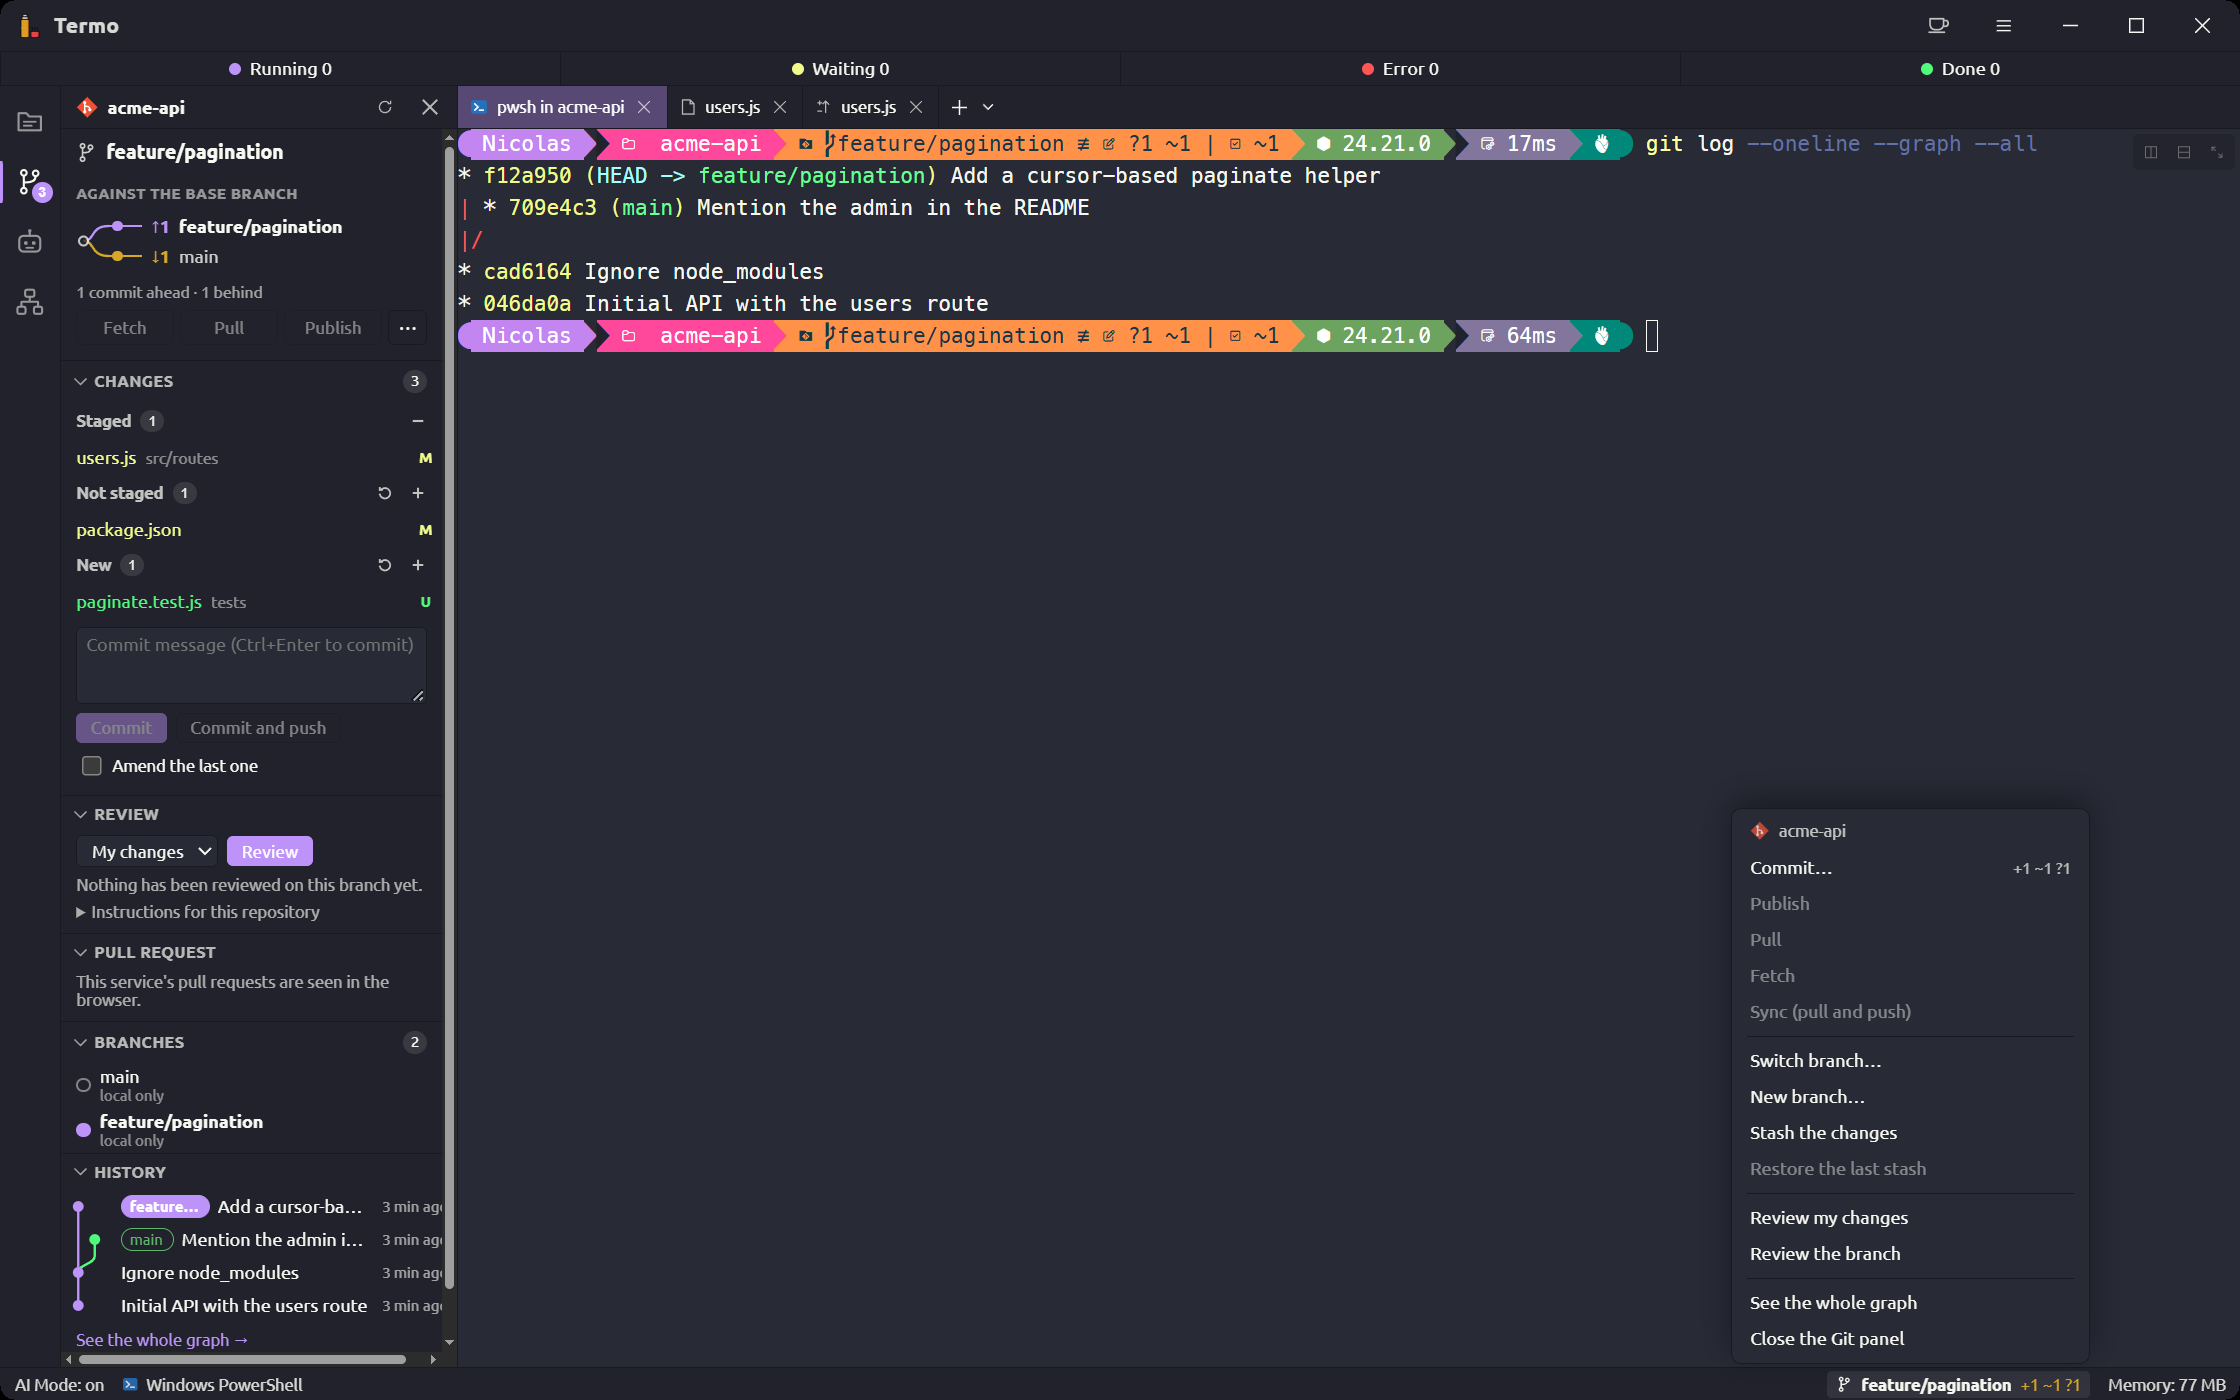
Which parts show, and where on the bar, is chosen while customizing the bar (right-click it → Customize the status bar…): click Repository on it to see them. See Status bar, which also has other Git items: the last commit, the stash, the remote branch and the last fetch.
Where your branch stands
At the top of the panel there are up to two diagrams. The first one only shows once the branch is on a remote:
- Against the remote: what there is to push (↑) and to pull (↓) between your branch and the one it tracks on the remote.
- Against the base branch: what your branch has of its own (↑) and how far the base branch moved since they parted (↓).
Bring in and send changes
| Button | What it does |
|---|---|
| Fetch | Brings in what is on the remote, without touching your files |
| Pull | Brings the remote's commits into this branch |
| Push | Sends your commits to the remote |
| Publish | Sends the branch to the remote for the first time |
Under More actions are Sync (pull and push), New branch, Stash the changes, Restore the last stash and See the whole graph.
With Preferences → Git → Remote → Fetch on its own, Termo fetches every so many minutes while the repository is in view, to know how much there is to pull.
Make a commit
The Changes section groups files into In conflict, Staged, Not staged and New.
- Hover a file and click Stage for the commit. For all of them at once, use Stage all on the group's header.
- Type the commit message.
- Click Commit, or press
Ctrl+Enter.
Other ways:
- With nothing staged, the commit takes every change.
- Commit and push makes the commit and pushes it.
- Amend the last one redoes the last commit with what is staged and the new message, instead of making a new one. Leave the message empty and it keeps the one it had.
To take a file out of the commit, use Unstage. Discard the changes undoes what you changed in that file; Termo asks you to confirm because it cannot be recovered.
See a file's diff
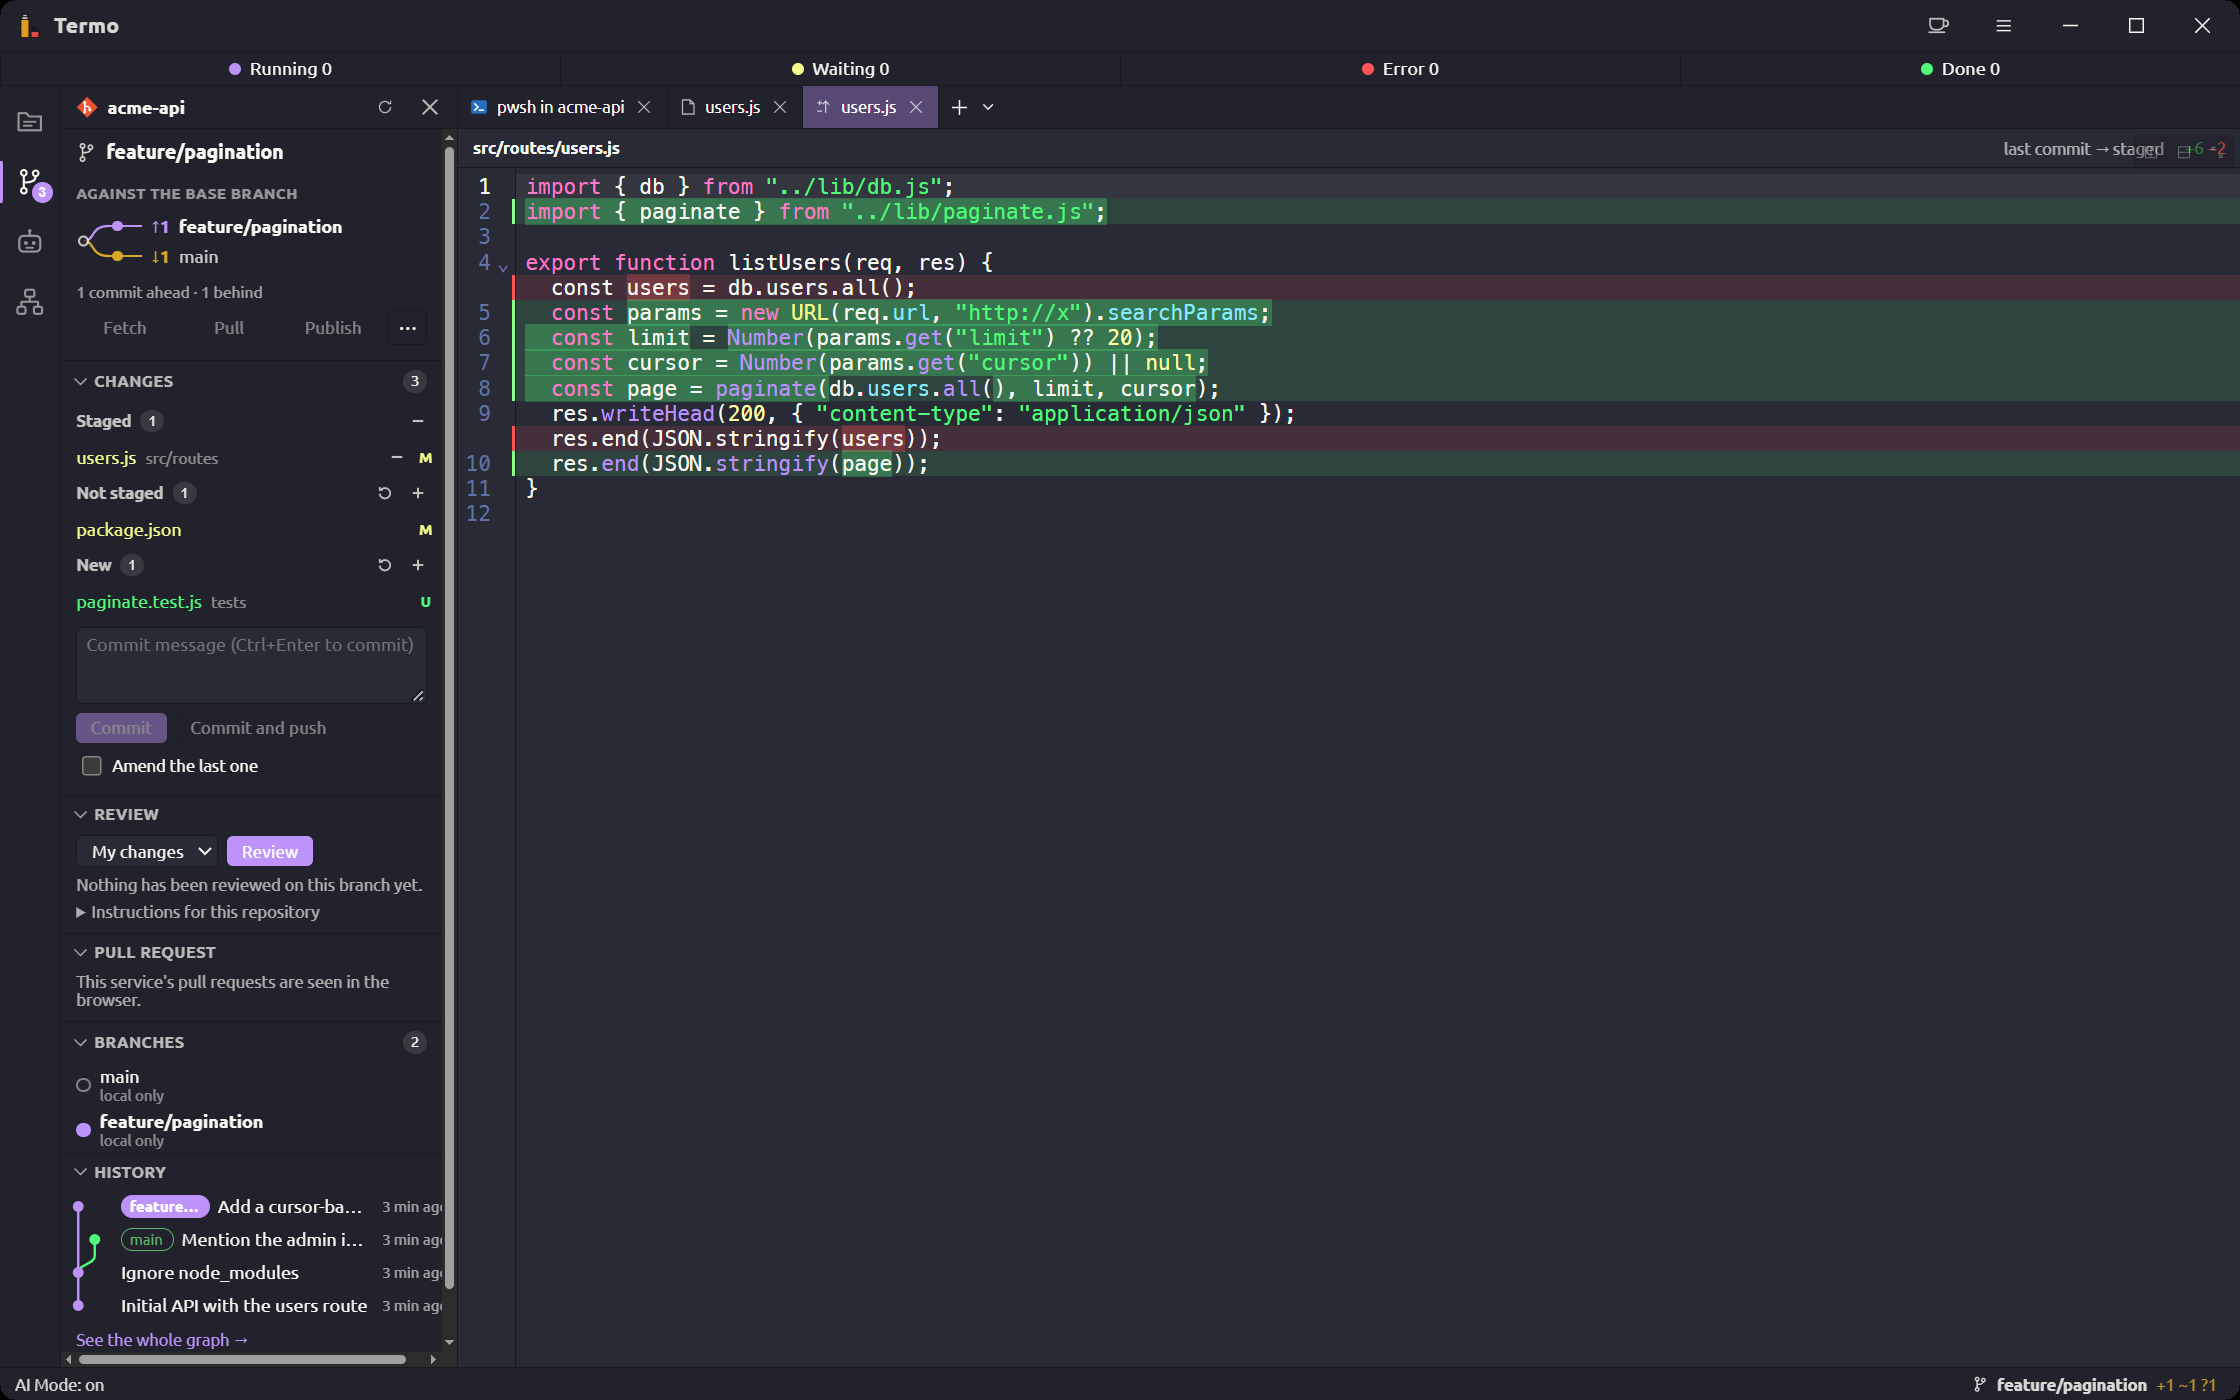
Click a file under Changes and its diff opens in a tab, with the removed and added lines marked in the same text. Unchanged lines collapse, and Open the file takes you to the editor.
Branches
The Branches section lists the local branches, with how far ahead of and behind their remote branch they are.
- Switch moves to that branch.
- Show the remote's N adds the branches that are only on the remote.
- To create one, use More actions → New branch, type the name and click Create.
History and graph
The History section shows the latest commits. See the whole graph opens the graph in a tab of its own.
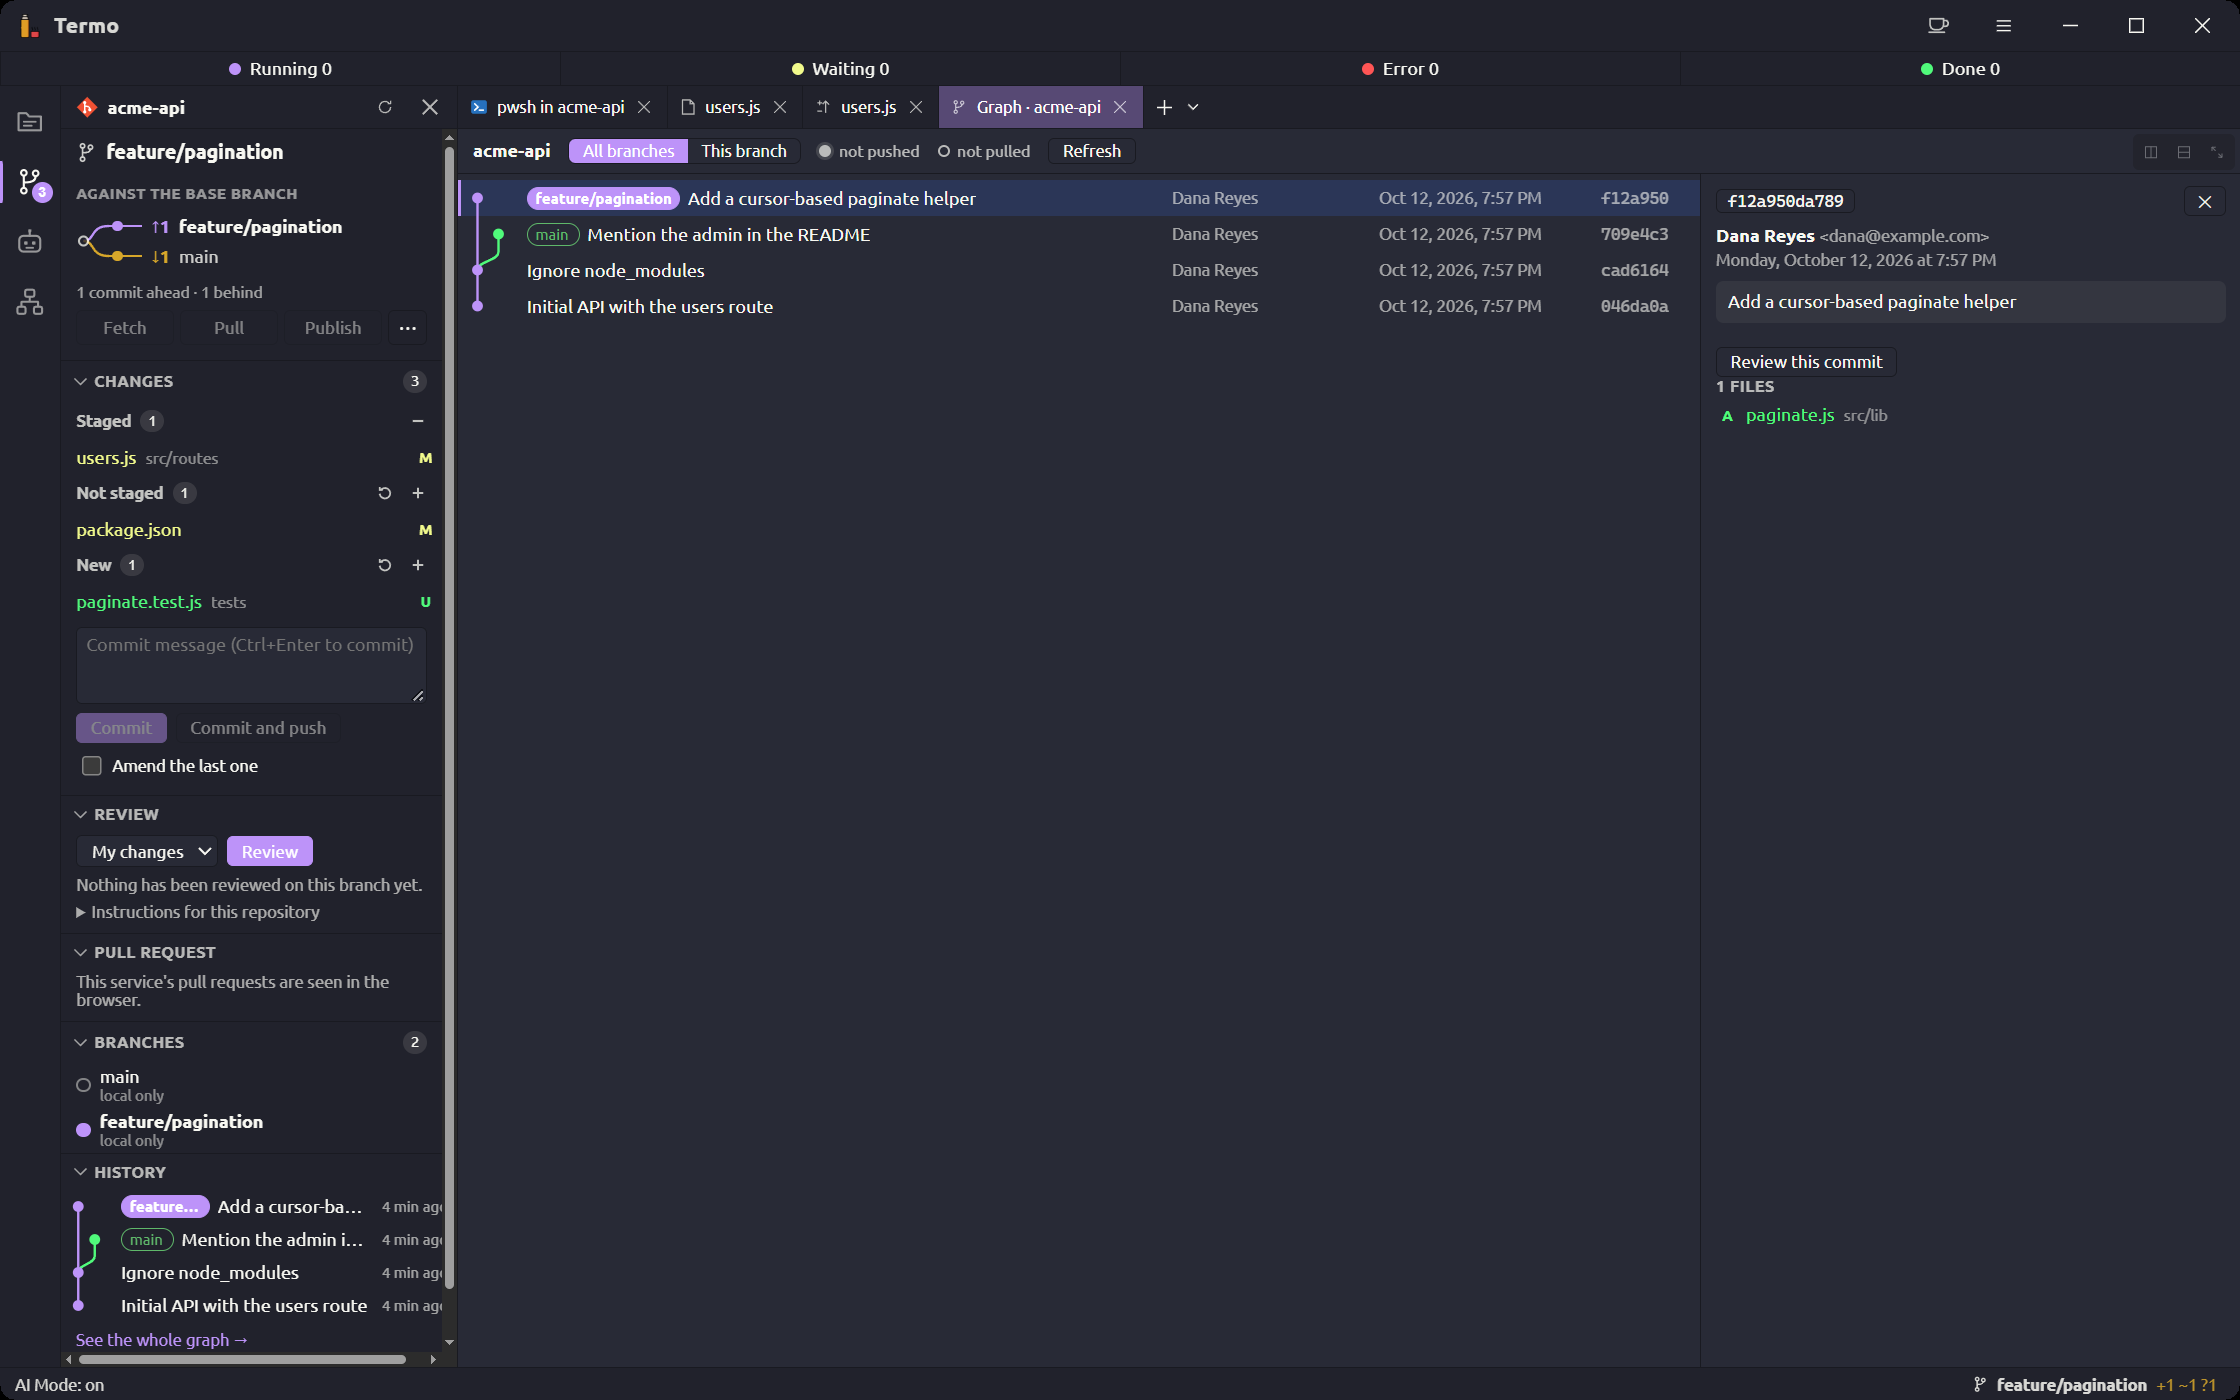
In the graph:
- Choose which branches show: All branches or This branch.
- Commits not pushed and not pulled are marked.
- Click a commit to see its details and files; clicking a file opens its diff.
- Load more brings in older commits.
A file in the editor
A file open in the editor shows who wrote each line (git blame), and its toolbar shows where the file stands: its branch, its changes and its last commit. See The editor. How the blame shows is chosen in Preferences → Git → File editor.
Pull requests
The Pull request section shows the current branch's one: its state (Open, Draft, Merged, Closed), the review (Approved, Changes requested, Review required), the checks, the conflicts and the number of files and comments. On GitLab it is called a merge request and works the same.
If the branch has none:
- Push the branch to the remote, if it is not there yet.
- Click Create pull request.
- Fill in Title, Description, Base branch, Labels and Reviewers (comma-separated). Tick Draft if it is not ready yet.
Edit changes those same fields later. The pull request's number opens it in the browser.
Code review by an agent
An agent reads your changes, without being able to touch anything, and points out what it finds. It needs AI Mode on and at least one agent CLI installed.
Ask for a review
- In the Review section, choose What to review: My changes (what you have not committed) or The branch (everything the branch has that the base does not).
- Click Review.
From the graph you can also ask to Review this commit.
What to do with each finding
Each finding has a severity: Serious, Warning or Suggestion.
| Action | What it does |
|---|---|
| Open in the diff | Takes you to the line it points to |
| Fix… | An agent of yours makes the change and leaves it uncommitted |
| Send to … | Leaves the finding written in the console of the agent in focus, for you to send |
| Dismiss | Hides it; Restore brings it back |
Fix… needs an agent marked as a fixer. You create one in Local agents from the Fixer of findings template.
Publish on the pull request
Tick the findings you want with Include in the pull request's comment and click Publish. Termo shows you the comment before sending it.
Tune the reviews
In Preferences → Git → Code review:
| Option | What it sets |
|---|---|
| Who reviews | Termo's reviewer, or an agent of yours marked as a reviewer |
| Who fixes | A fixed fixer agent, or Ask every time |
| Review by default | My changes or the branch |
| Show from | The lowest severity you want to see |
| Review the branch before pushing | On a push from Termo, reviews the branch and, with anything serious found, asks before going on |
| Review the branch when its pull request is opened | Reviews when the pull request is opened |
| What to mind | Instructions for every review, in any repository |
| Longest it may take | How long a review may run |
Each repository can add its own instructions from the panel, under Instructions for this repository.
A review uses your plan of whichever agent reviews, and that model reads the reviewed code. A push made from the console does not go through the review before pushing.
Notices you may see
- A merge is unfinished (or a rebase, cherry-pick, revert or bisect in progress): finish or cancel it from the console.
- Another git process is at work on this repository: wait for it to finish.
- This repository's changes weren't read: its config defines filters, which are programs git runs to compare files. So as not to run them unasked, Termo does not read those changes.
- Show what git answered shows the exact output when an operation fails.
Turn Git off
With Preferences → Git → Turn Git on unticked, Termo asks git for nothing: the panel, the status bar item and the marks go away.